Overview
To allow Cloudlvl to manage your AWS infrastructure, you need to provide secure access to your AWS account. There are two recommended methods:IAM Roles (Recommended): More secure with temporary credentials and fine-grained permissions, but requires more setup steps.IAM User: Simpler to set up with permanent access keys, but less secure for production environments.
Method 1: IAM Roles (Recommended)
IAM roles provide enhanced security by using temporary credentials and can be configured with precise permissions. This is the recommended approach for production environments.Step 1: Use External ID
- Copy the generated External ID (this unique identifier ensures only Cloudlvl can assume your role)
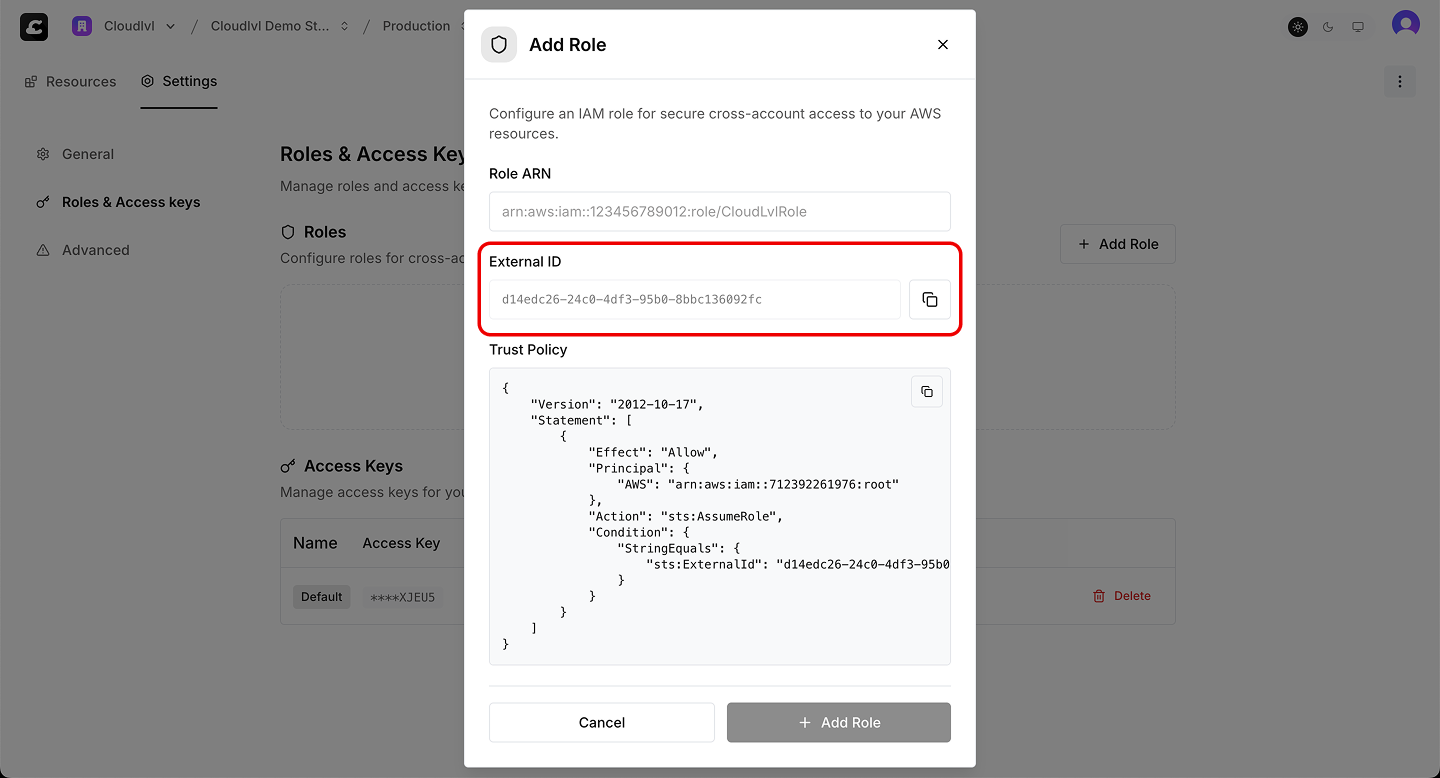
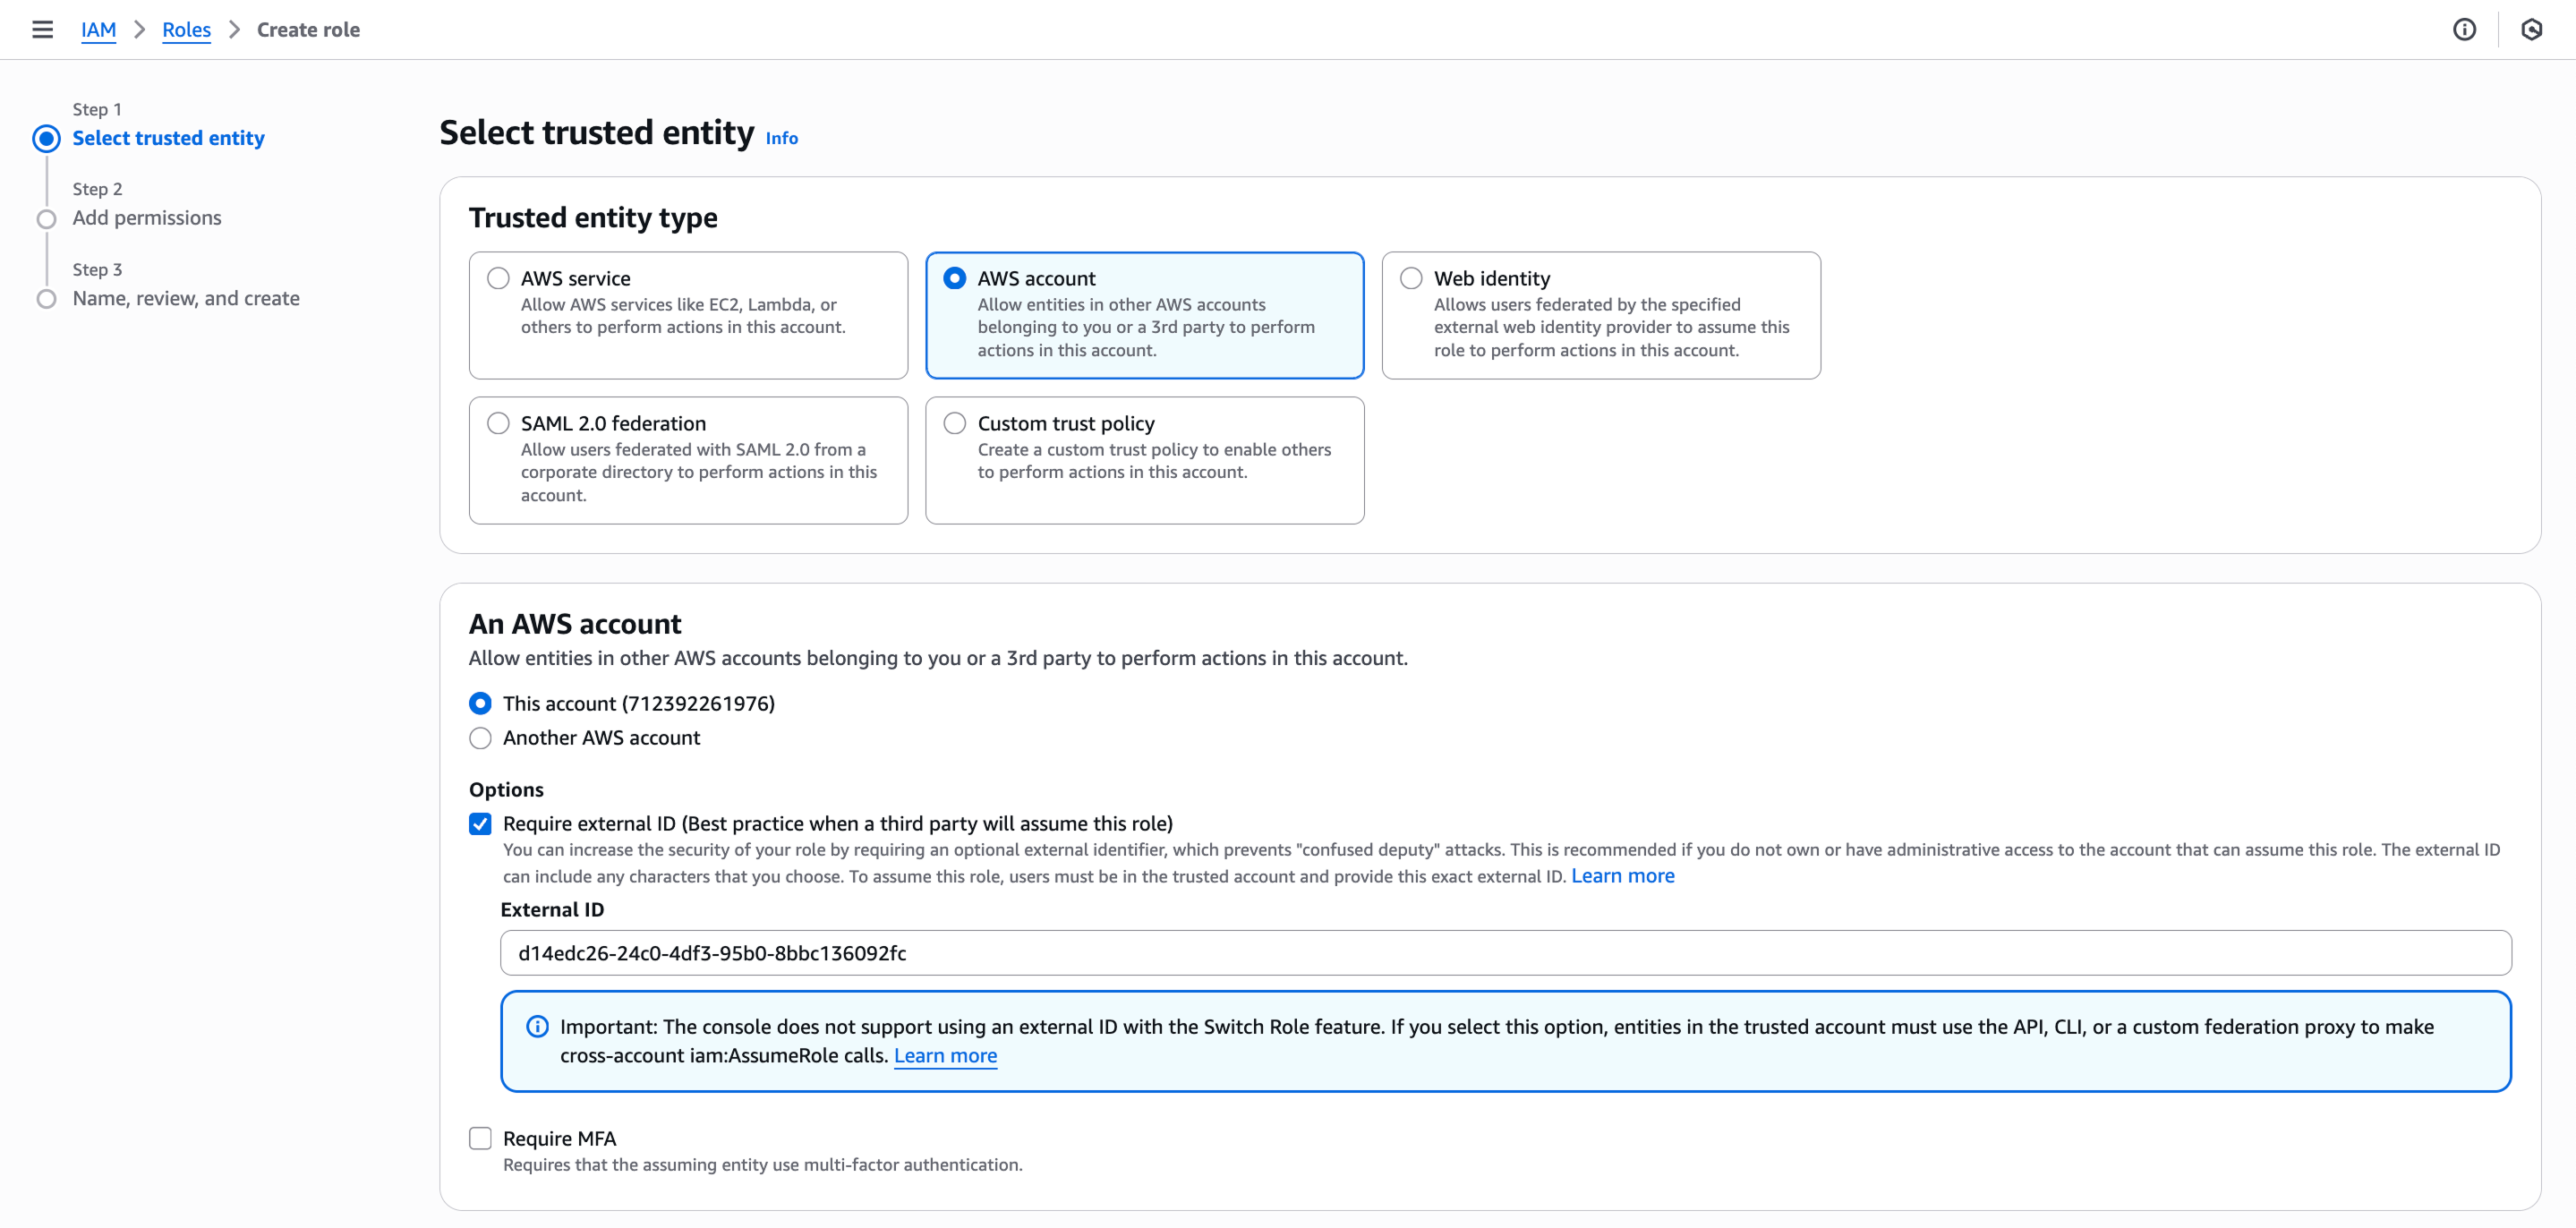
Step 2: Create IAM Role in AWS Console
- Go to the AWS IAM Console
- Click “Create role”
- Select “AWS account” as the trusted entity type
- Check “Require external ID” option
- Paste the External ID from Step 1 and click “Next”
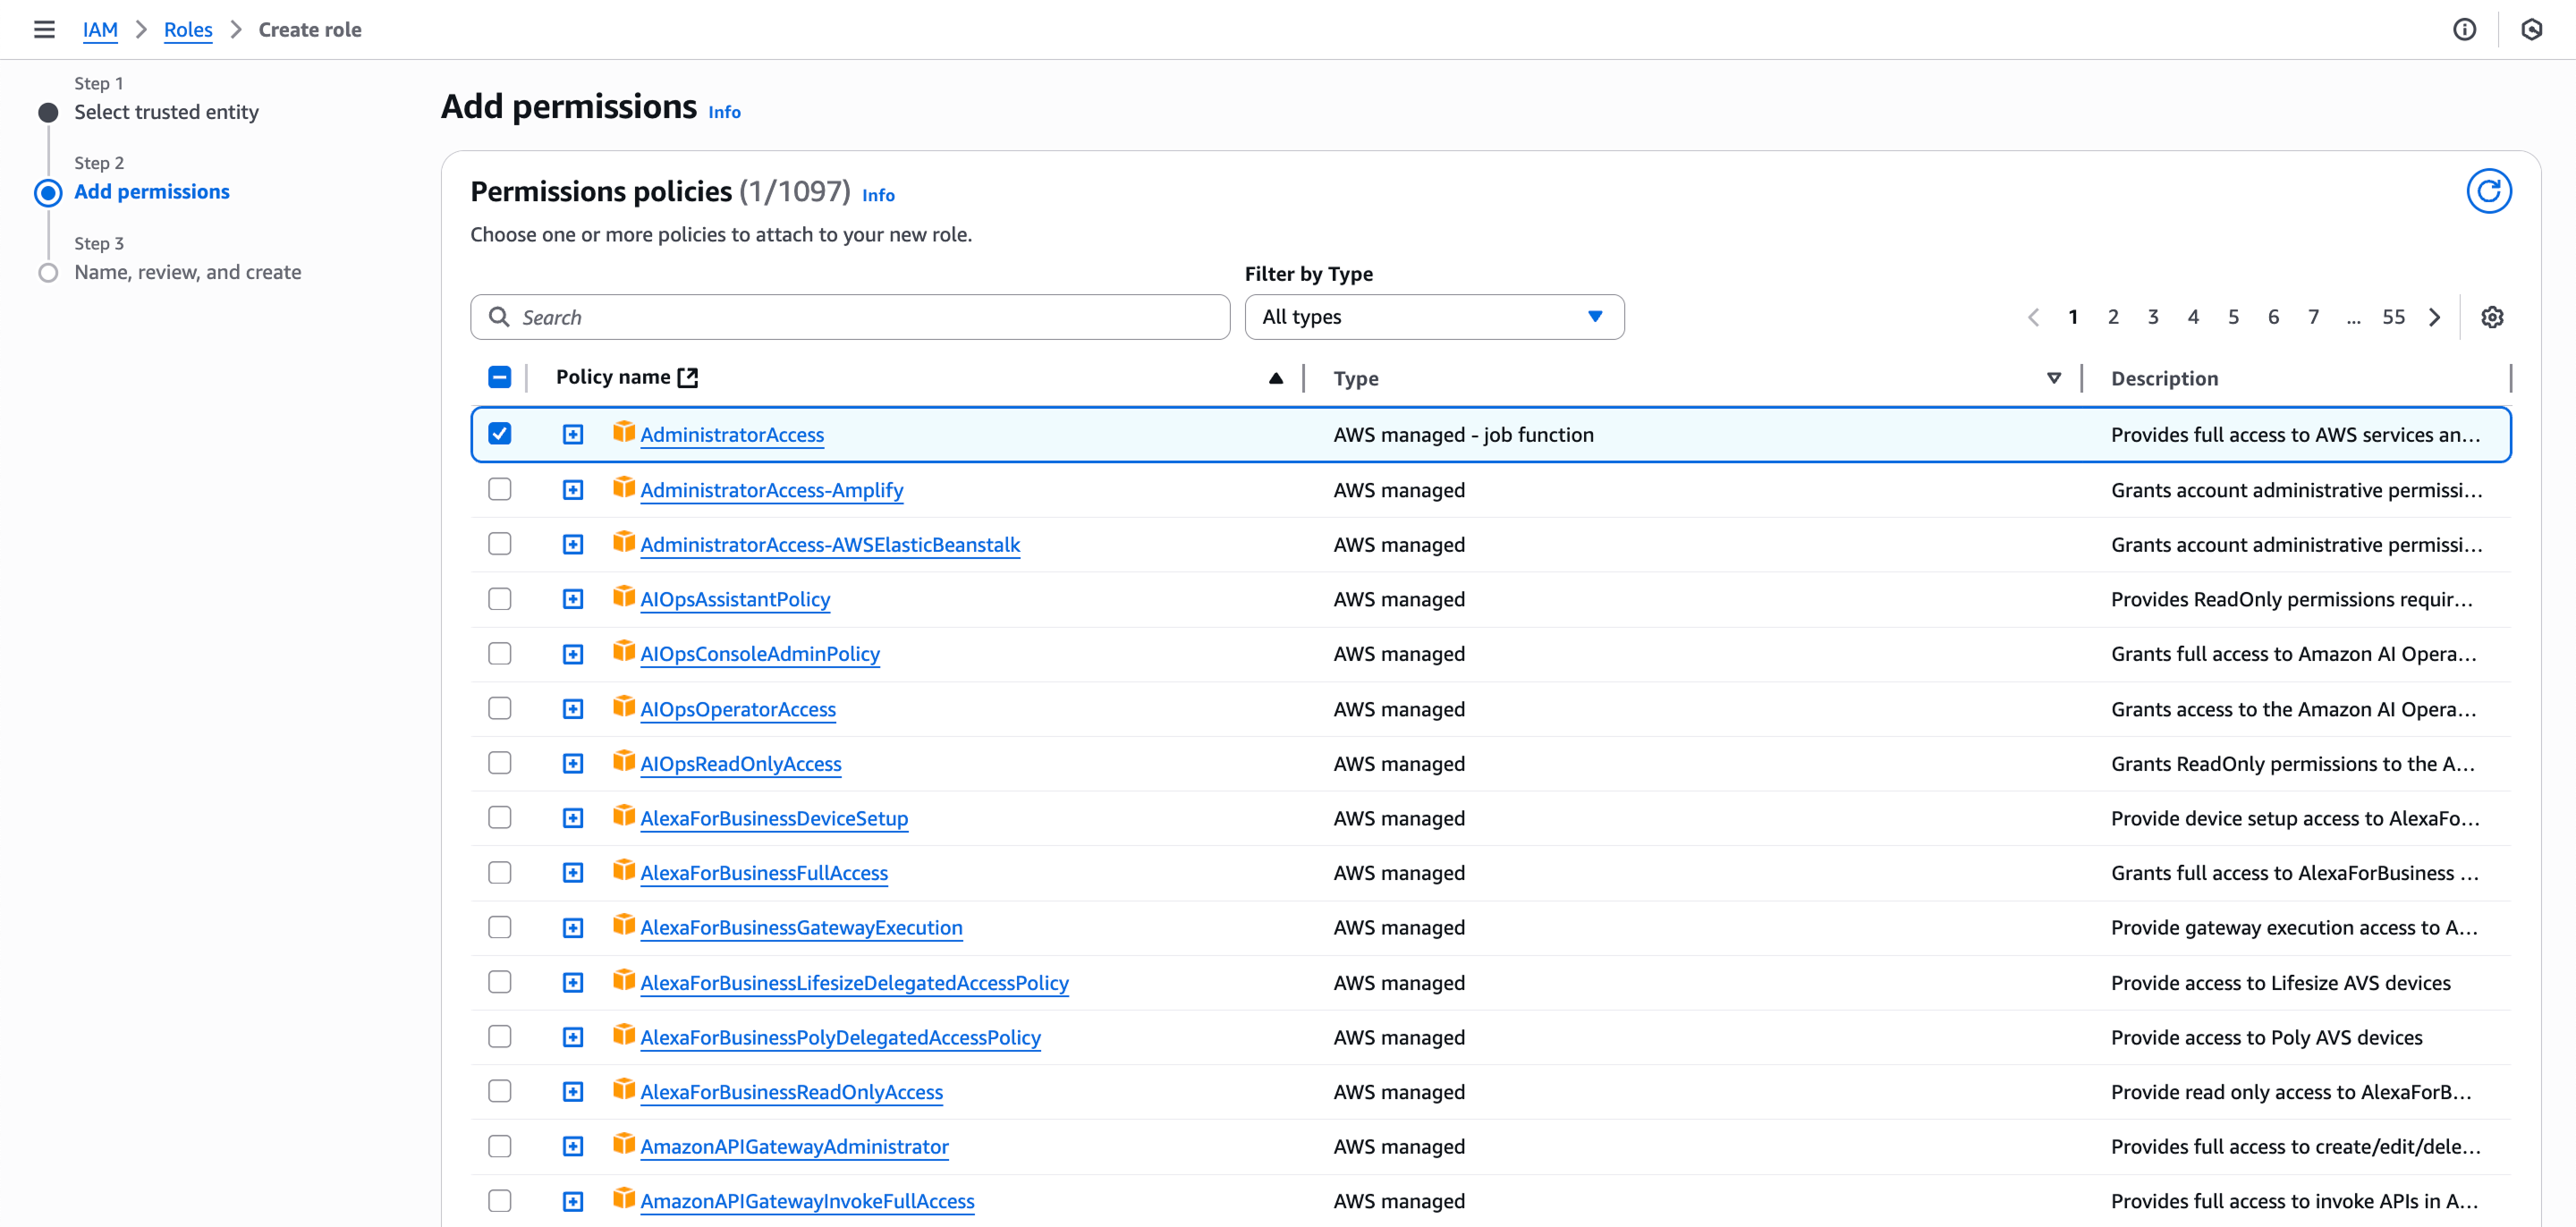
Step 3: Configure Permissions
- Select the permissions that Cloudlvl will need for your use case:
- For full infrastructure management:
PowerUserAccessorAdministratorAccess - For specific services: Choose relevant AWS managed policies (EC2, Lambda, S3, etc.)
- For full infrastructure management:
- Click “Next”
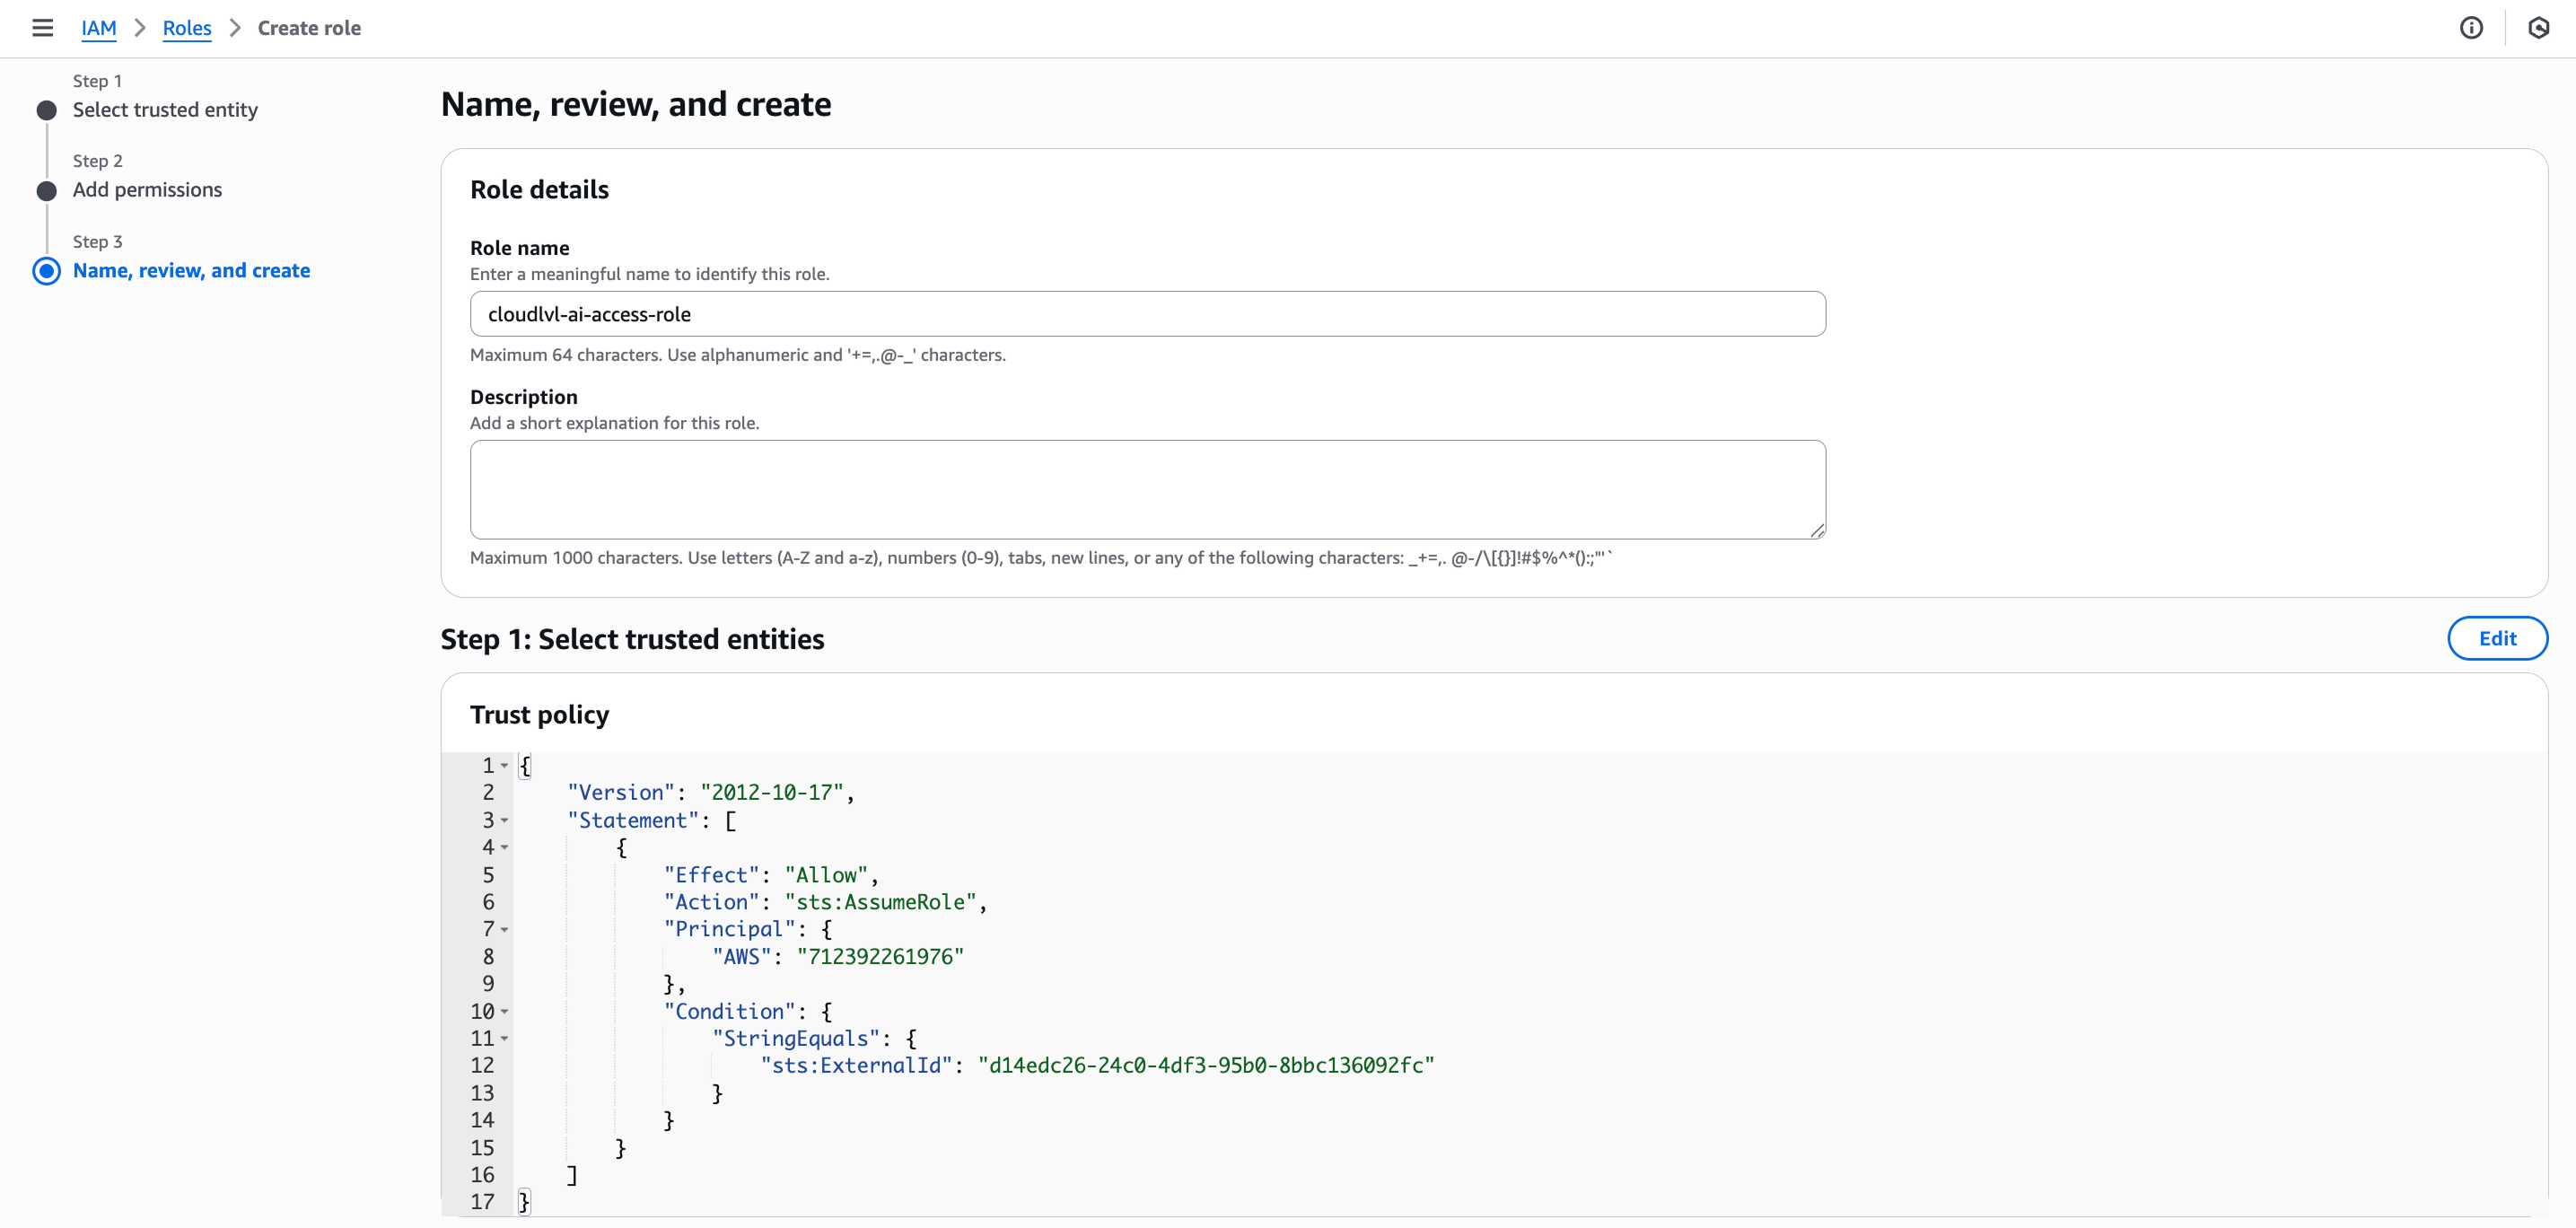
Step 4: Finalize Role Creation
- Enter a Role name (e.g., “CloudlvlAIRole”)
- Add a Description (e.g., “Role for Cloudlvl to manage AWS infrastructure”)
- Click “Create role”
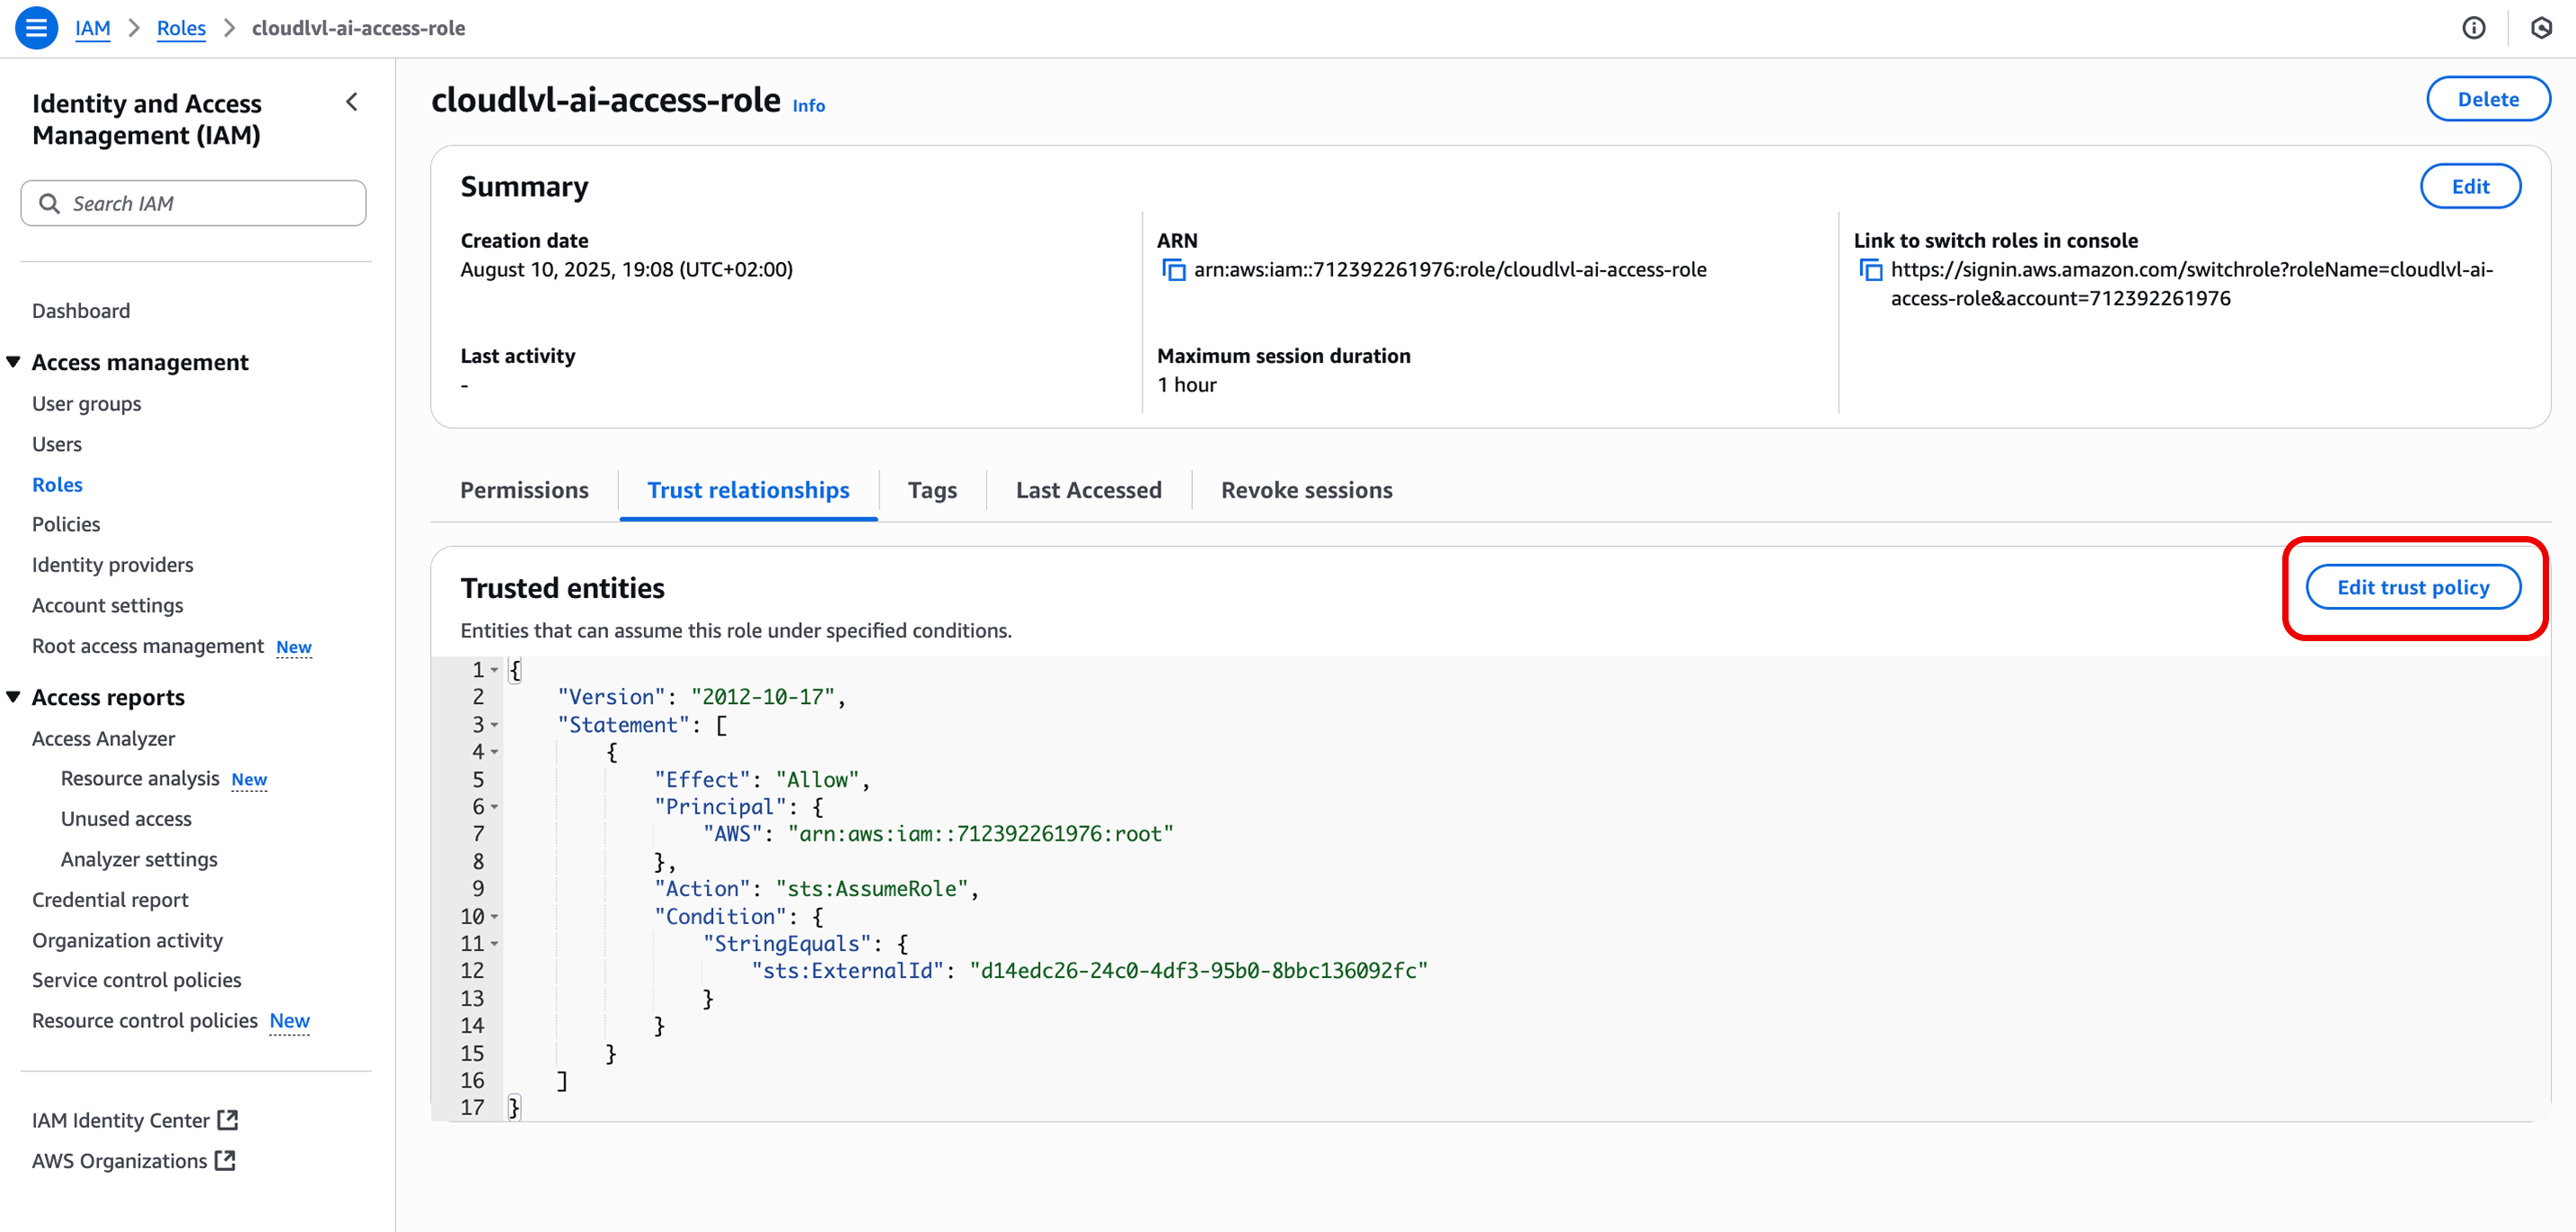
Step 5: Update Trust Policy
- Find your newly created role in the roles list and click on it
- Go to the “Trust relationships” tab
- Return to the Cloudlvl and copy the trust policy from the setup form
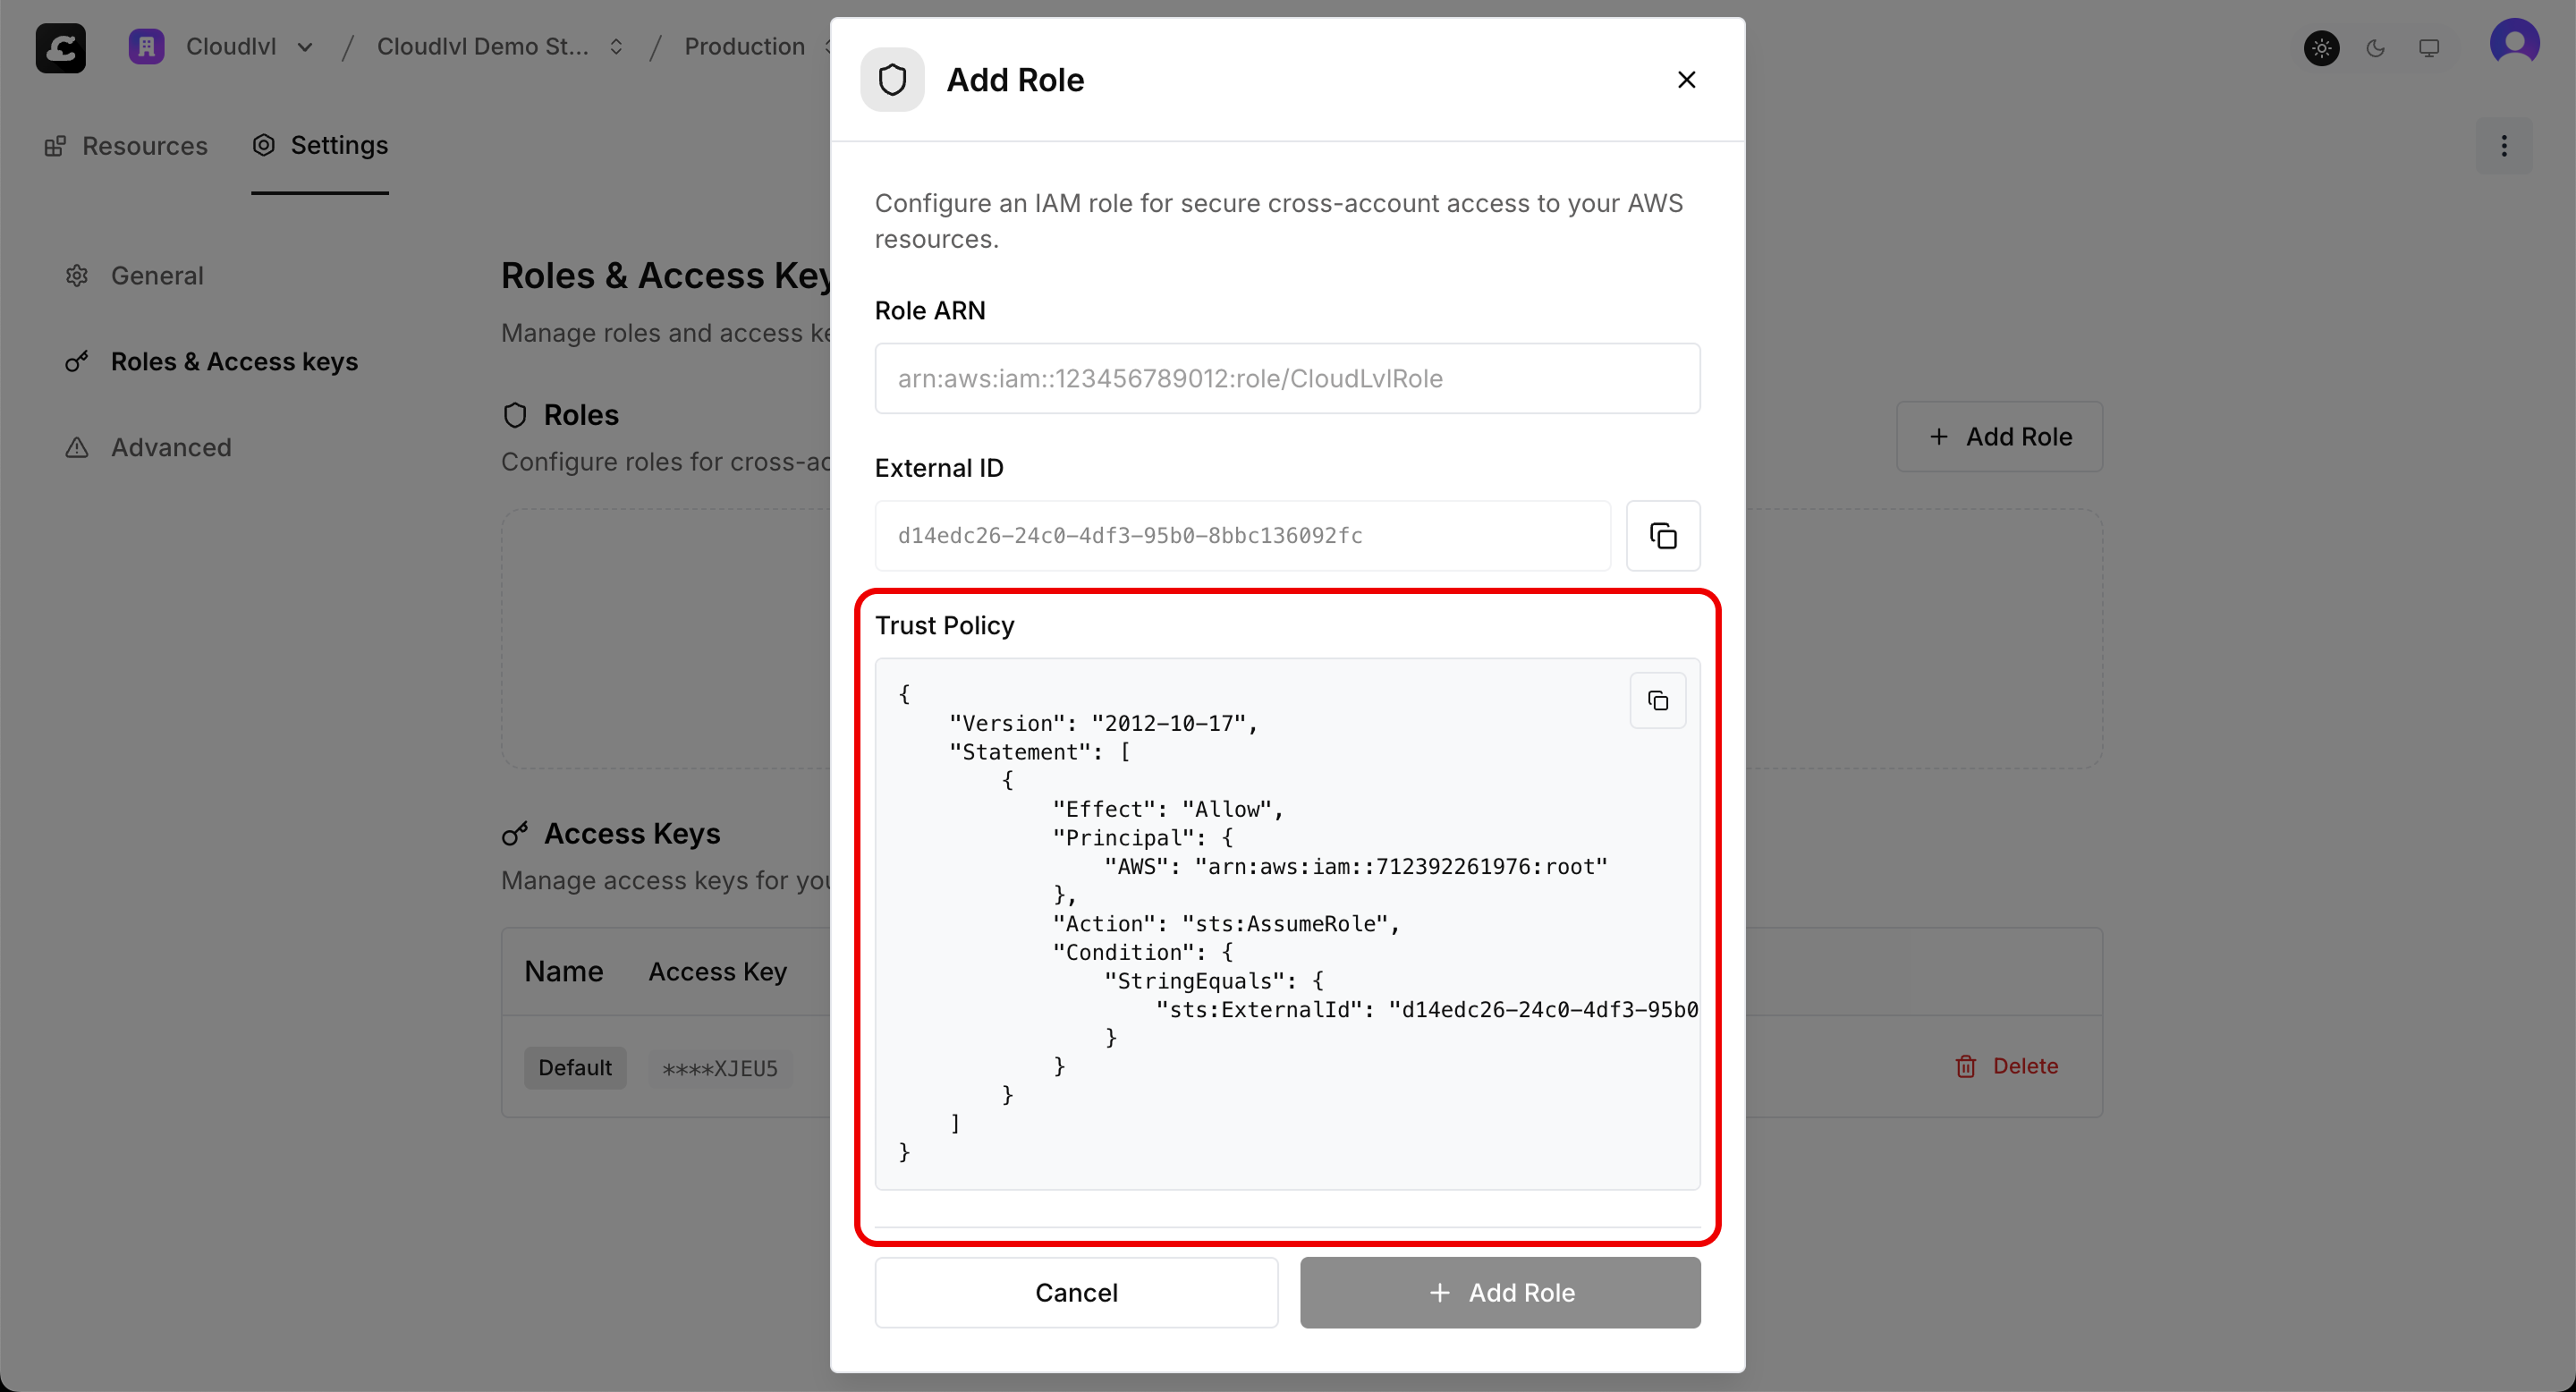
- Back in AWS Console, click “Edit trust policy”
- Replace the existing policy with the one from Cloudlvl
- Click “Update policy”
Step 6: Complete Setup in Cloudlvl
- Return to the Cloudlvl form
- Enter your Role ARN (found in the role summary)
- Click “Submit” to validate and complete the setup
Method 2: IAM User
IAM users provide direct access through access keys. This method is simpler but less secure than IAM roles.Option A: Use Existing Access Keys
If you already have AWS access keys configured:- Use your existing Access Key ID and Secret Access Key
- Ensure the associated user has the necessary permissions for Cloudlvl operations
- Enter the credentials in the Cloudlvl setup form
Option B: Create New IAM User
Step 1: Create IAM User
- Go to the AWS IAM Console
- Click “Create user”
- Enter a username (e.g., “cloudlvl-ai-user”)
- Select “Programmatic access”
- Click “Next”
Step 2: Set Permissions
- Choose how to assign permissions:
- Attach policies directly: Select AWS managed policies
- Add user to group: Create or use existing groups with appropriate policies
- For full infrastructure management, consider:
PowerUserAccess(recommended for most use cases)AdministratorAccess(full access, use with caution)
- Click “Next” through the remaining steps
- Click “Create user”
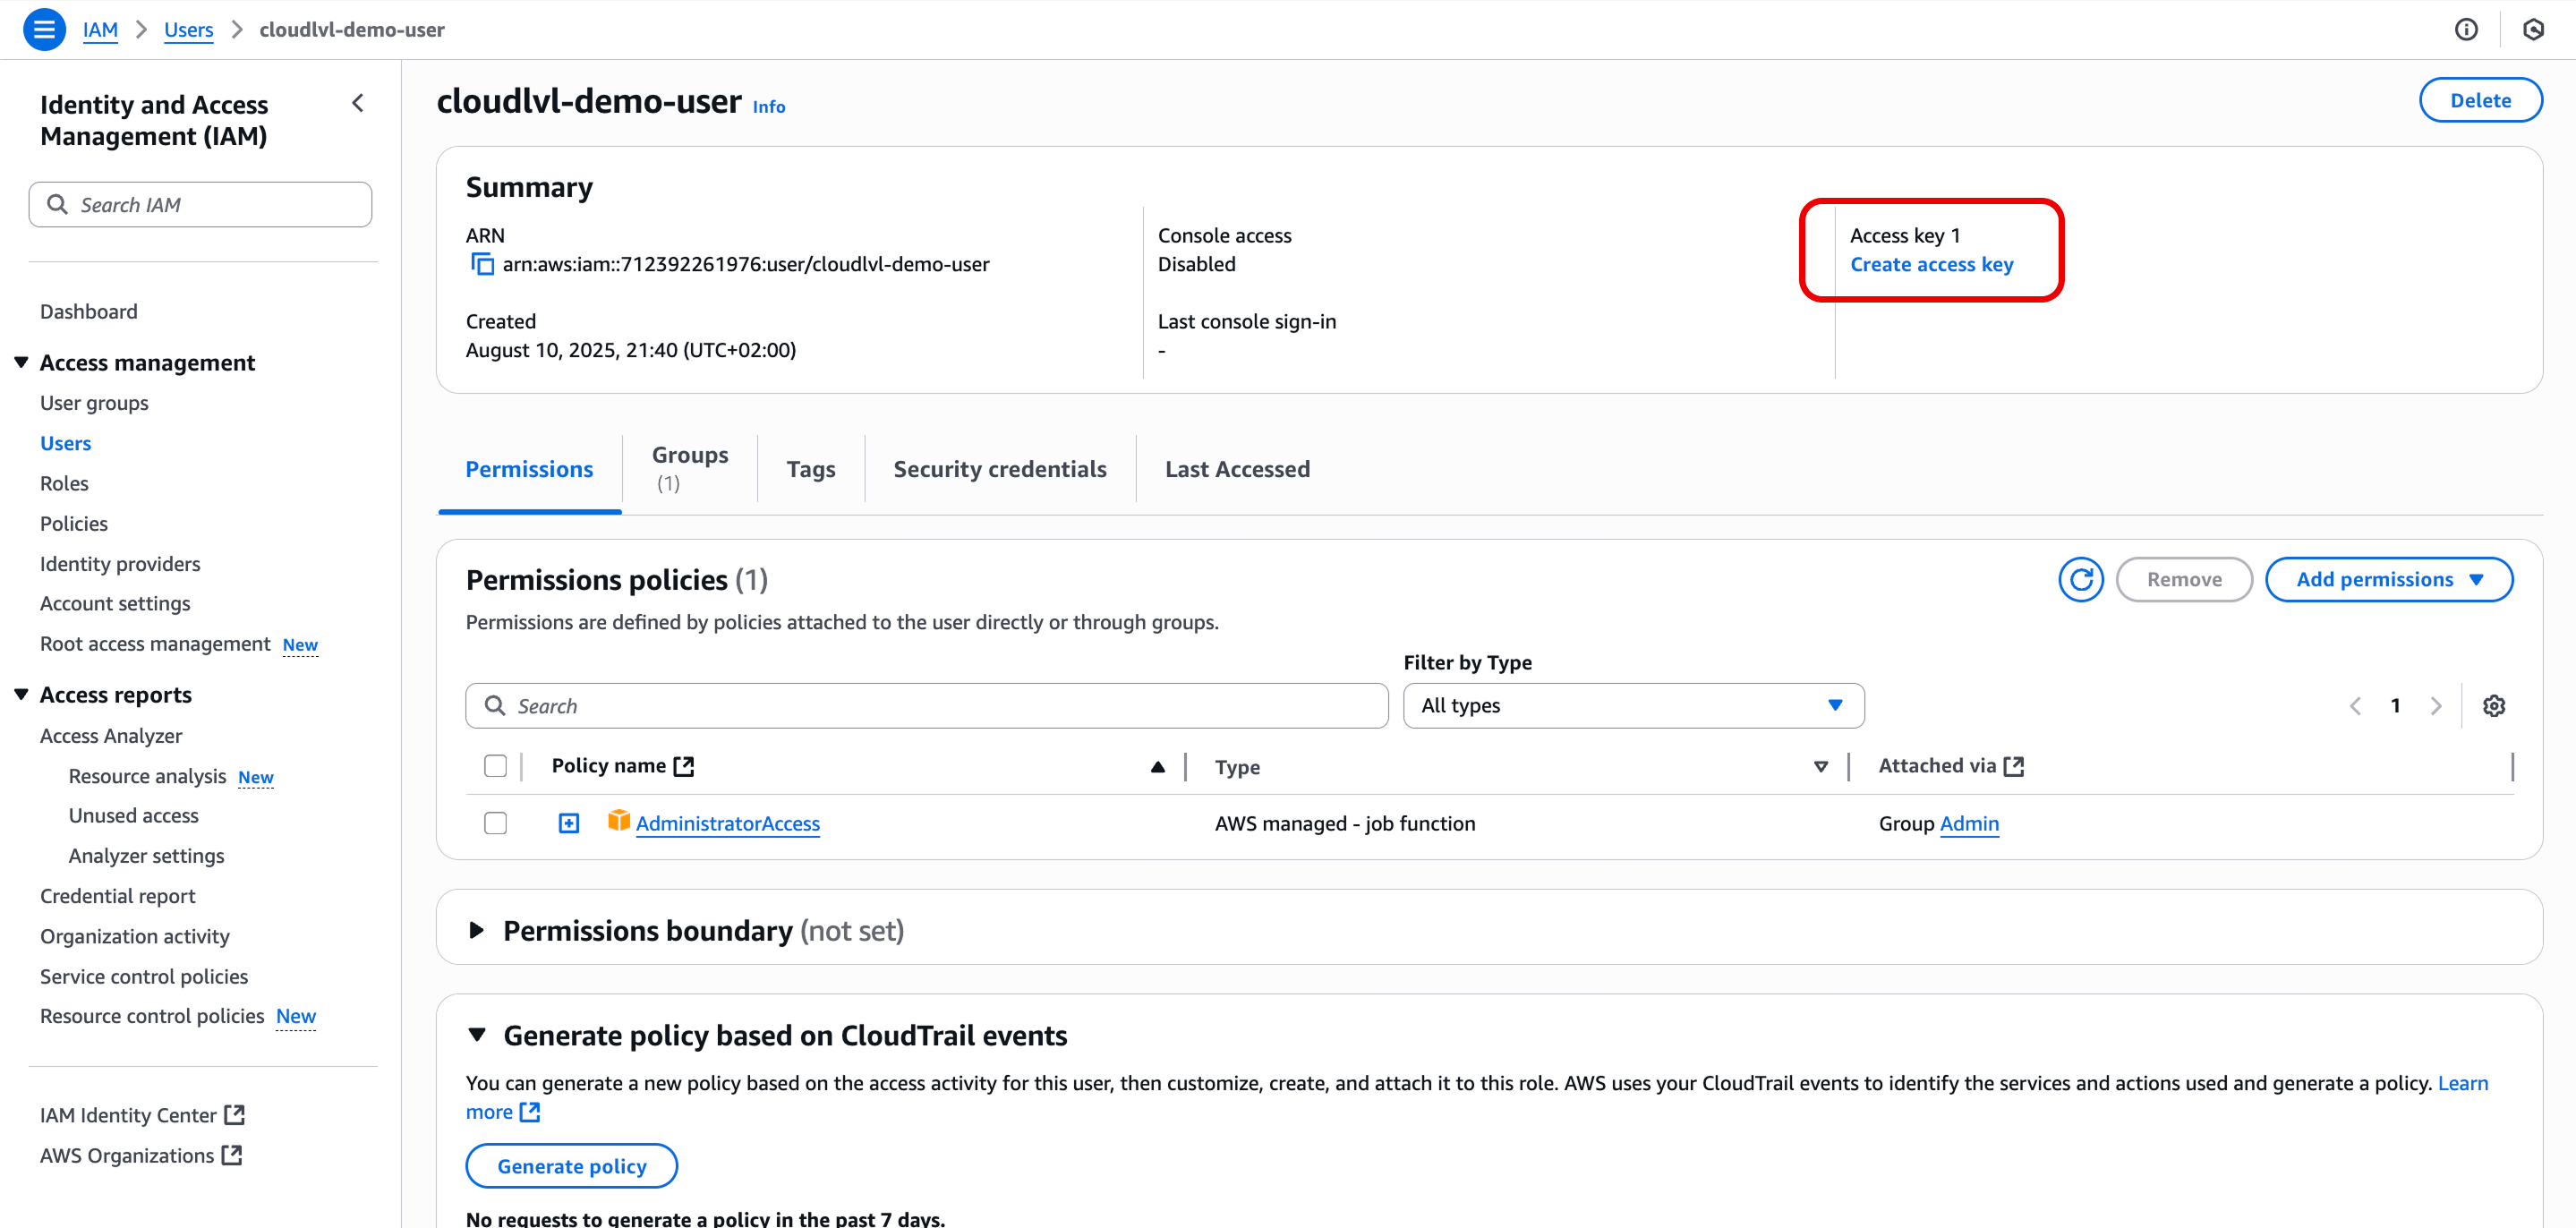
Step 3: Generate Access Keys
- Click on your newly created user from the users list
- Go to the “Security credentials” tab
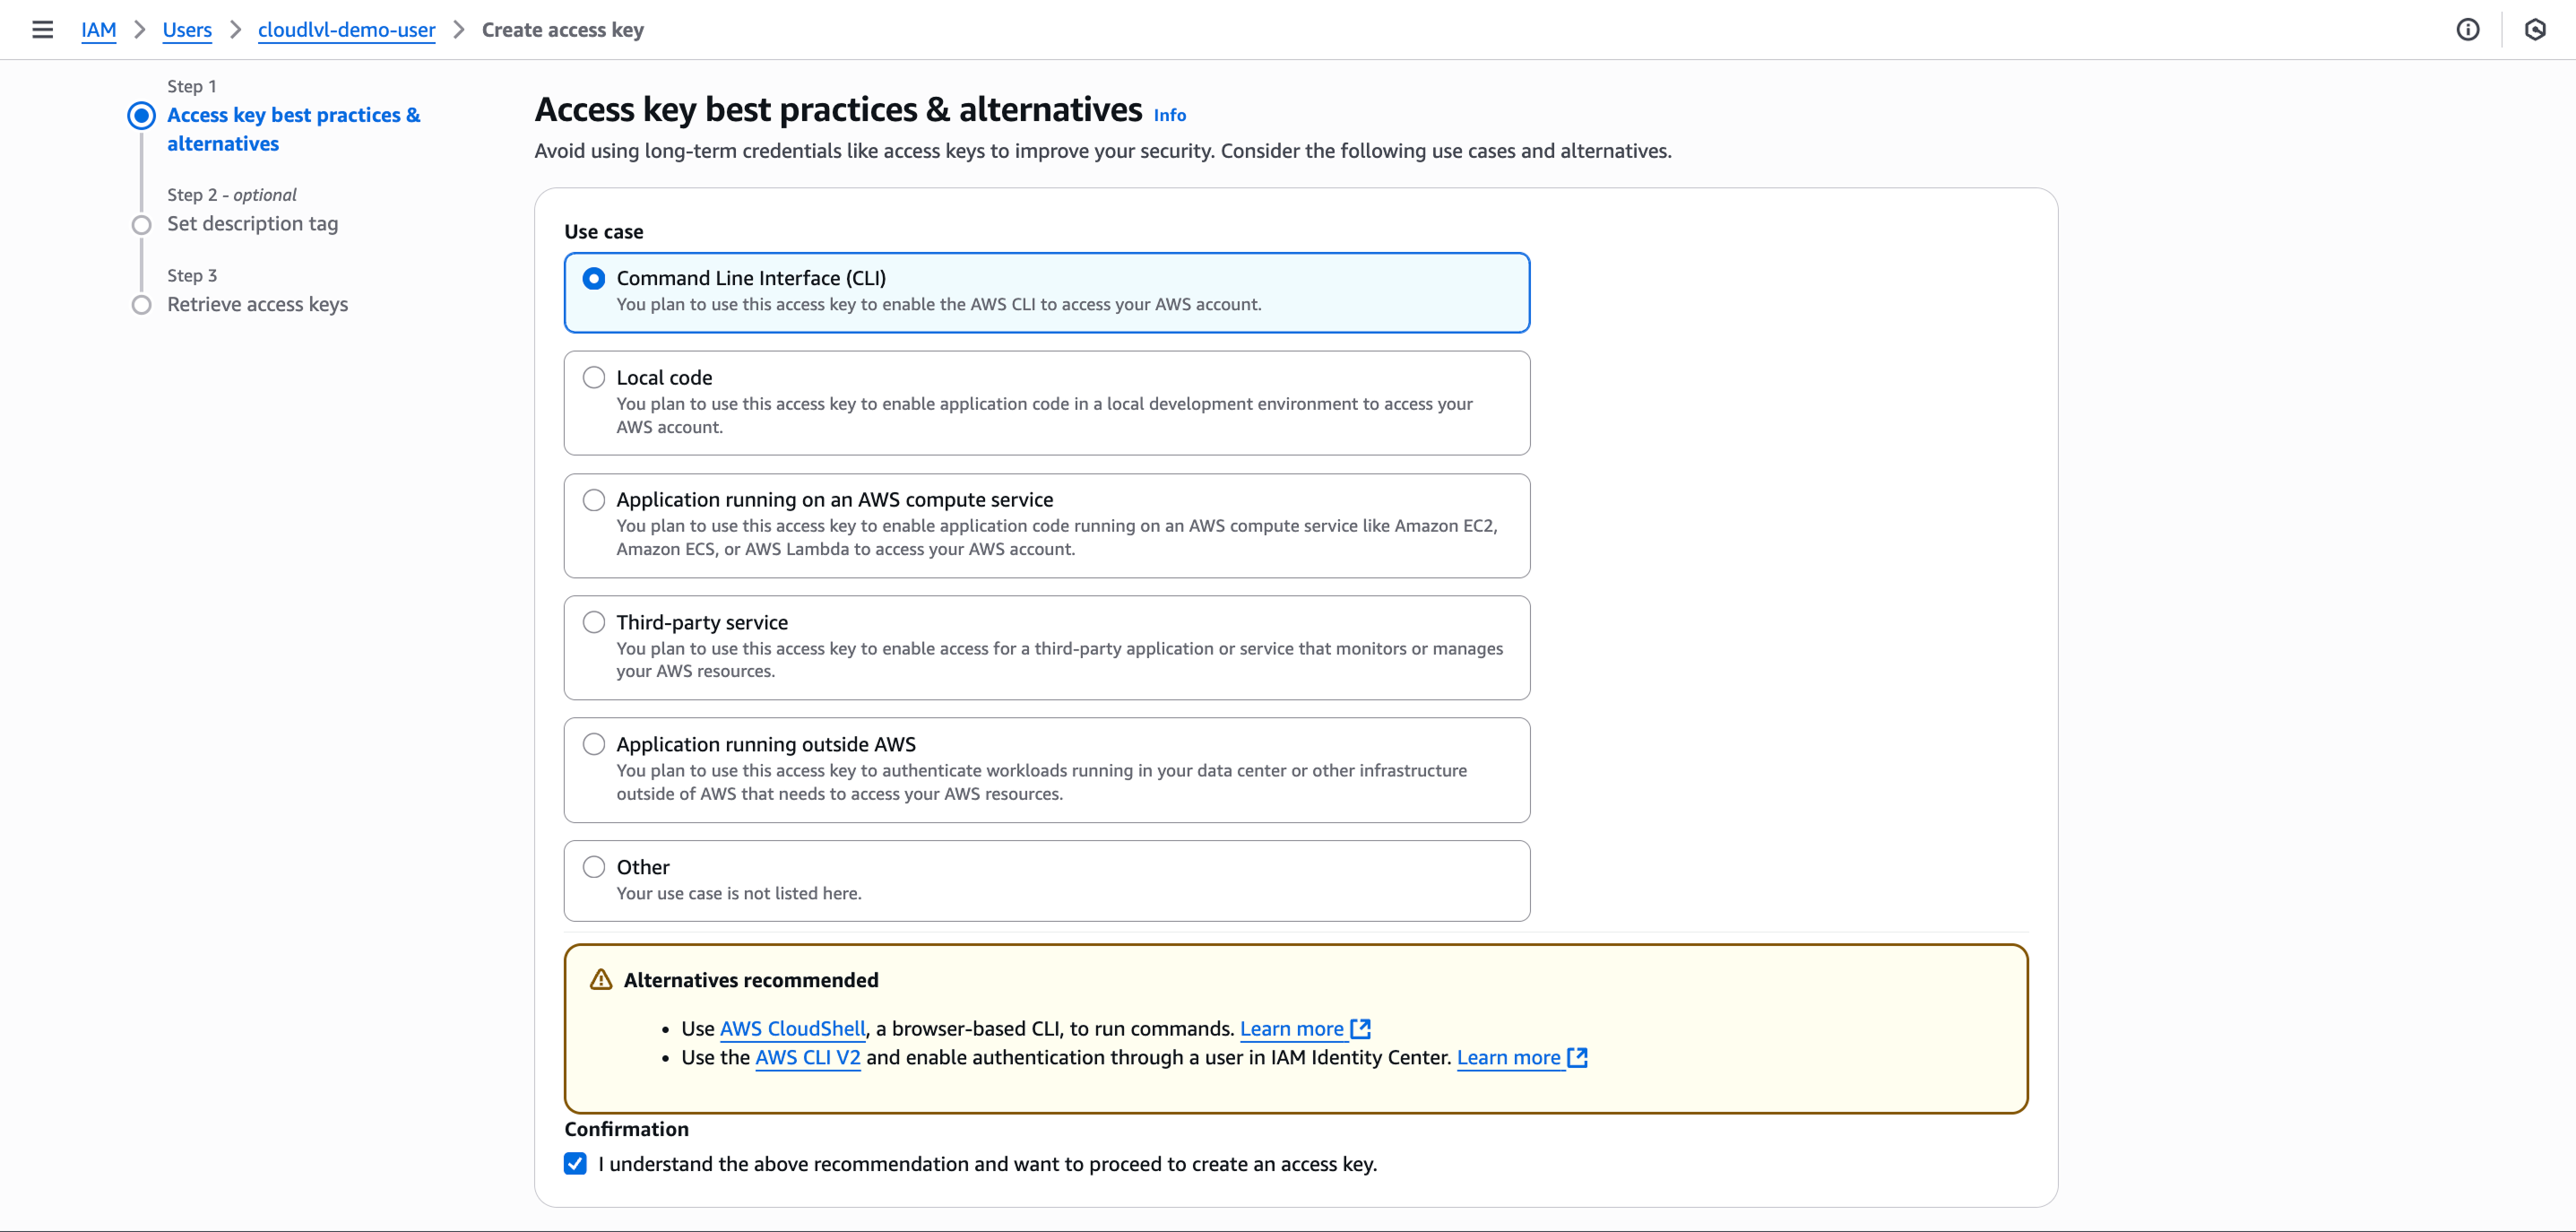
- Click “Create access key”
- Select “Command Line Interface (CLI)” as the use case
- Check the confirmation checkbox acknowledging the security best practices
- Click “Next” and then “Create access key”
Step 4: Copy Credentials
- Copy both the Access Key ID and Secret Access Key
- Store them securely (you won’t be able to see the secret key again)
Step 5: Configure in Cloudlvl
- Return to the Cloudlvl app setup form
- Enter your Access Key ID and Secret Access Key
- Click “Submit” to validate and complete the setup
Next Steps
Once you’ve completed either setup method:- Start with simple commands - Try basic operations like listing resources
- Explore AI capabilities - Begin using natural language to manage your infrastructure
Need help with permissions ?
Continue with the Permissions Management guide